Basic sous vide techniques
Learn how to season, seal, heat, and finish dishes like a pro chef with our comprehensive sous vide technique guide.
COOKING SOUS VIDE
Francesco Feston
10/11/20234 min read

Sous vide represents a straightforward and highly convenient cooking method. To begin, season your food and hermetically seal it in a plastic bag. Submerge it in a water bath preheated to your desired final cooking temperature. The cooking duration varies, ranging from one hour to several days, contingent on the type of food. Upon completion, remove the food from the bag and briefly sear it for enhanced flavor and texture.
Although there may be minor variations within each dish, nearly every sous vide meal adheres to the same series of steps. Below, we provide a more detailed examination of these steps.
Flavoring the Food
As with many traditional cooking techniques, it's common to season the food prior to cooking. This seasoning can range from a simple sprinkling of salt and pepper to more complex additions, such as elaborate sauces, spice rubs, or even smoking the food. Depending on the type of seasoning, it can either be directly applied to the food or included within the pouch alongside the food.
For those using a standard home vacuum sealer and wishing to add liquids, it's advisable to freeze the liquid before adding it to the pouch. This prevents the vacuum sealing process from extracting the liquid. Otherwise, food-grade ziplock bags can typically be used for sealing food with liquids.
While seasoning for sous vide, most conventional spices and flavorings are suitable, with a few exceptions:
- Fresh, tender herbs like basil or parsley may not retain their flavor well.
- Fresh garlic or ginger can turn bitter.
- Vinegars can become more pronounced.
- When cooking for longer than 8 hours, it might be advisable not to salt the meat immediately, as it can draw out moisture.
You can also re-season the food after it emerges from the water bath, which is a great way to apply traditional rubs that impart surface flavors to the food without affecting the interior.
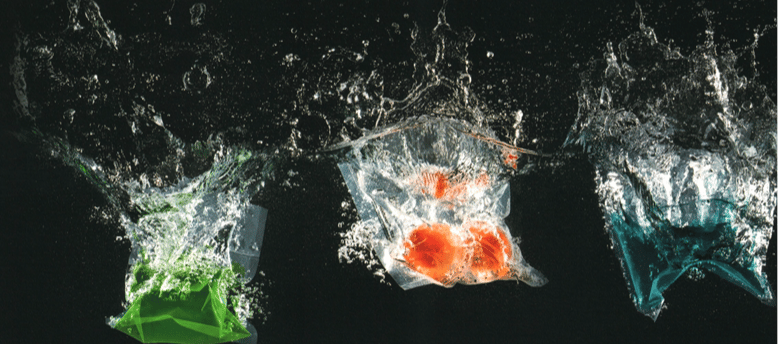
Sealing the Food
Once the seasoning and food are placed inside the pouch, evacuate the air and seal it tightly. Eliminating the air ensures closer contact between the food and the water in the water bath, facilitating more efficient heat transfer since water conducts heat more effectively than air. The sealing process can be executed using various materials, such as ziplock bags, food-grade plastic wrap, a FoodSaver Vacuum Sealer, or even a chambered vacuum sealer.
Although the term "sous vide" means "under vacuum," the vacuum-sealing of food is not indispensable for the sous vide process. Almost any food-grade, sealable plastic bag will suffice. Many cooks use Ziploc brand freezer bags with excellent results. When using non-vacuum sealed plastic bags, the water displacement method, also known as the Archimedes principle, can be employed. This involves submerging the bag in water, leaving only the top exposed before sealing. Water pressure expels the air, resulting in a secure seal. When executed properly, this method is nearly as effective as using a weak vacuum sealer and is well-suited for most low-temperature sous vide cooking.
Heating the Water
Simply bring the water bath to the desired cooking temperature. This water bath temperature typically matches the final desired temperature for your food. Depending on the type of heat regulator, some may allow you to place the food in the water while it heats, while others may require preheating the water to avoid early temperature fluctuations.
Maintaining the temperature is traditionally one of the most challenging aspects of sous vide cooking from both a quality and safety perspective. For those experimenting with sous vide, temperature control can be achieved using a large pot of water on a stove with a thermometer or by pouring heated water into a beer cooler. For those seeking regular use of sous vide, there are various options available for home cooks, such as the SousVideMagic, Sous Vide Supreme, and PolyScience Professional, with prices ranging from $150 for the SousVideMagic to $800 for the PolyScience unit, frequently employed in professional kitchens.
Cooking the Food
Place the food pouch in the water and allow it to cook for the specified duration as indicated in the recipe or on a Time and Temperature chart. For items with extended cooking times, consider rotating the food every 6 to 10 hours, especially if you are using less precise sous vide equipment. At higher temperatures, sous vide pouches may tend to float due to the release of air from the food. If this occurs, using a plate or bowl to weigh them down is recommended.
Completing the Dish
To achieve an optimal finish and texture, especially with meats, it's advisable to quickly sear the meat. This can be accomplished in a hot pan, on a grill, or with a culinary blowtorch. Some recipes may suggest alternative finishing methods, such as breading and deep-frying for chicken. Another option is to rapidly cool the food in an ice bath containing a 1:1 mixture of ice and water, followed by refrigeration or freezing for subsequent reheating.
Selecting Your Finishing Method
The choice of finishing method is a crucial aspect of most sous vide dishes, as each method imparts distinct flavors and textures to the meat. Depending on the dish and your desired outcome, consider one of the following methods:
1. Pan Frying: A common method for finishing sous vide meats, pan frying is typically done in oil in a hot pan on the stove. The meat is seared just until it browns before removal.
2. Grilling: Grilling adds a smoky flavor and characteristic grill marks, making it an excellent choice for finishing meat. In most cases, grilling and pan frying are interchangeable.
3. Torching: Many sous vide enthusiasts invest in a good butane food torch for searing their food. The Iwatani torch is a commonly used option.
4. Roasting: Roasting or broiling, while less common, can be an effective way to develop crusts or sear the top and sides of sous vide meat. This is typically done at temperatures below 450°F (232°C) or under the broiler. High, indirect heat on the grill can also achieve this.
5. Smoking: Some recipes call for smoking the food either before or after sous vide cooking. For longer cooking times or cold smoking, smoking the meat beforehand can reduce the time the food spends in the danger zone.